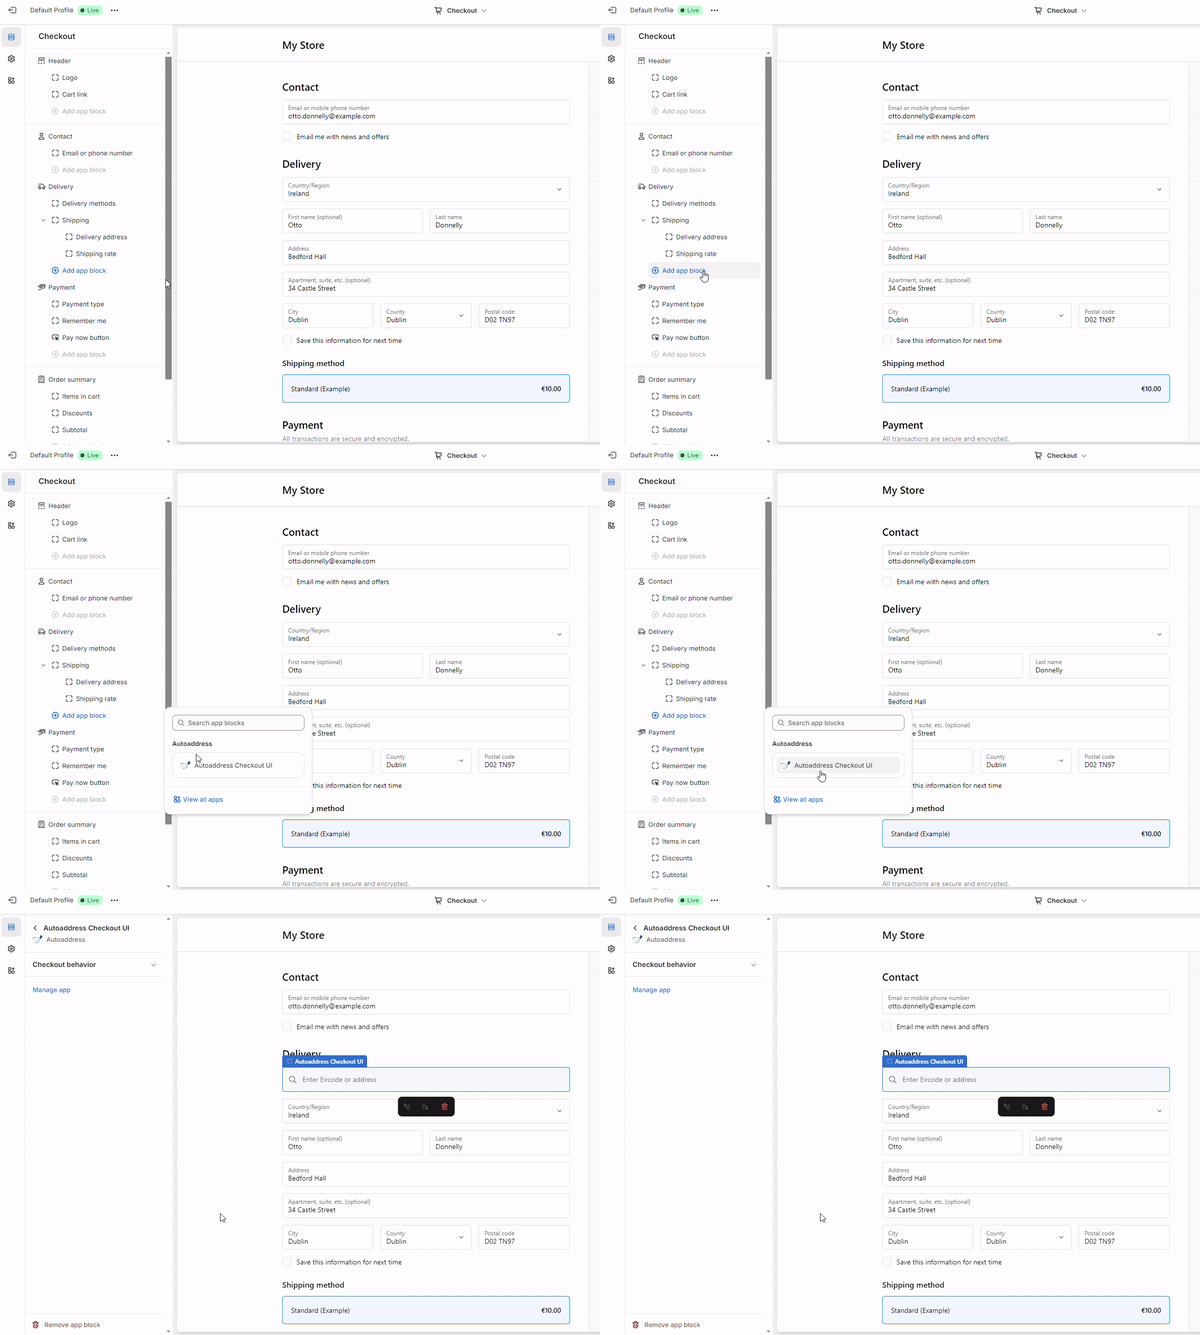
- Search for Autoaddress in the Shopify app store or find us here: https://apps.shopify.com/autoaddress-checkout
- Click Install and follow the instructions, then select your subscription. For each subscription type, we offer a 7-day free trial*.
- Now, all that is left to do is to add the app into your checkout page. Navigate to your Checkout Editor, click Add app block (under the Delivery section) and select Autoaddress Checkout UI.
To ensure you get the most out of our app, make sure to disable native address lookup if it's enabled on your store**.
- Click Save and now the app is ready for use!
* For more information on the subscriptions, see FAQ section below
** See below for disabling the native address lookup
Autoaddress can also be integrated into the Shopify Checkout by using Address Autocompletion. This is a Shopify provided API that allows customers to see suggestions when typing directly into the Address field.
Please note that due to the limitations of the Shopify API, below are the differences of using Autoaddress Checkout and Address Autocompletion:
| Autoaddress Checkout | Address Autocompletion |
|---|---|
| Has Drilldowns | No Drilldowns |
| Can return geo co-ordinates | No Geo co-ordinates |
| Can search for any country | Search available for selected country only* |
*You can only search for addresses in other countries if you change the Country in the dropdown. If Additional Address fields are enabled, the Autocomplete functionality may not work with the following countries: Belgium, Brazil, Chile, Germany, Israel, Mexico, Netherlands, Spain
The Autoaddress Extension takes full advantage of the Autoaddress API functionality and will capture more addresses whereas the Shopify Address Autocompletion integration is a more native seamless experience but has a more limited functionality.
Note: Both integrations can be active at the same time.
To enable Address autocompletion, follow the below steps:
- Go to the Settings page for your Shopify store
- Select the Checkout option from the left-hand menu
- On the Customize your checkout section, click the Customize button then the Settings icon on the left of the menu
- Scroll to the bottom and under the Address autocompletion heading, tick the box and then select Autoaddress Checkout

- The Address field on your checkout page should now have a magnifying glass icon on the right side to indicate that Address autocompletion is enabled

The Autoaddress app features additional settings which can simply be toggled on or off.
On your admin page, find Autoaddress under the Apps section then click Configure extension to see the additional settings.


The available additional settings are:
- PO Box - Allows PO Boxes to show as addresses
- Organization/Business names - Allows organization names to appear as suggestions
- Transliteration - Swaps non-latin characters with latin characters
- Fold to ASCII - Replaces characters that are not in the Basic Latin Unicode block (first 127 ASCII characters)
- Location data - Returns co-ordinates for address
Shopify provides the ability to customize data for a specific part of your store. Autoaddress can provide location data for your order object.
Once you turn on the Setting to retrieve location data, there are additional steps to ensure you get data returned.
To do this, navigate to Settings → Custom Data → Orders. Here you will see a button labeled "View unstructured metafields", click this.
Note: The button will only be visible if any new orders are made after turning on the setting.
If there are no new orders made after enabling the setting, click "Add definition" and ensure Namespace and key is labelled custom.location_coordinates

From here, click "Add definition". Input any name and definition for this metafield, this can be used for any programmatic access of orders that your store requires.
Ensure you also choose the metafield type as "Single line text" and press Save.

The location data field will now be visible on all orders.
- Where can I download the Autoaddress app for Shopify Plus?
- You can search for Autoaddress on the Shopify app store or find us at this link: https://apps.shopify.com/autoaddress-checkout
- What countries does Autoaddress support?
- Autoaddress supports over 250 countries. For a full list of supported countries, click here.
- How easy is it to get started?
- It is easy to get started in 3 simple steps!
- Install the Autoaddress app
- Choose your subscription plan
- Add the Autoaddress UI extension to your checkout
- It is easy to get started in 3 simple steps!
- Where does the data come from?
- Autoaddress works with leading data providers including USPS, Royal Mail, Eircode and TomTom to source address and location information.
- How does Autoaddress pricing work?
- Pricing is dependent on your selected plan; Pay as you go or Monthly
- Both plans include a 7-day free trial
- Full pricing details are available on the store page
- When will I be charged?
App charges are added to the regular Shopify 30 day billing cycle. Click here for more information on Shopify's app charges.
- Does Autoaddress have a support team?
Yes, you can email support@autoaddress.com.

